Creating effective training materials isn't about just throwing a document together. It's a thoughtful process: you figure out your goals, build content that actually engages people, and then fine-tune it based on real-world feedback. When you move past generic handouts and start building learning paths that genuinely help your team, family, or students, you're making one of the smartest investments you can.
Why Great Training Materials Are a Game Changer
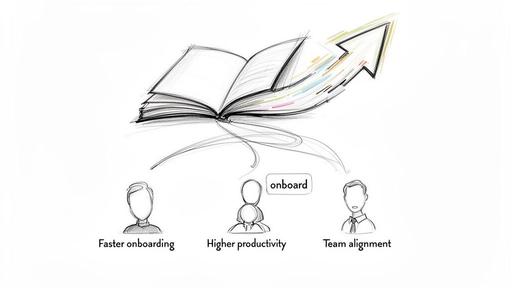
Let's get one thing straight: thinking of training materials as a business expense is a completely outdated mindset. See them for what they are—a powerful investment in your people. It’s an investment that pays you back with faster onboarding, better performance, and a team that’s truly on the same page.
When you learn how to craft training that really connects, you stop just dumping information. You start building a clear path to understanding and skill. This isn't just for big corporations, either. It’s just as relevant for a family learning a new budgeting app, a small business teaching its staff about a new product, or students prepping for a big exam.
The Shift from Expense to Investment
The real magic is in the personal touch. One-size-fits-all resources just don't stick. A well-designed training plan, on the other hand, speaks directly to the audience's needs, making the content feel relevant and immediately useful.
The numbers back this up. The global corporate training market is booming, which tells you that creating effective training isn't just a "nice-to-have" anymore. Online classes are leading the charge, holding over 60% of the market share simply because they're so accessible. If you're curious, you can find more insights about the corporate training market and its rapid growth online.
This simple chart breaks down the process into a clear, repeatable cycle.
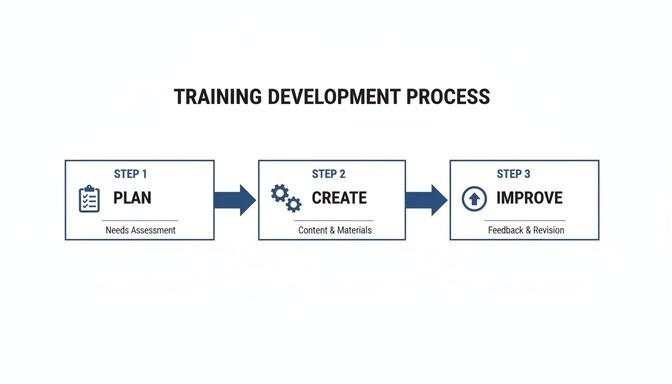
As you can see, it’s not a one-and-done task. The best materials come from a loop of creating, getting feedback, and making things better.
Empowering Everyone to Be a Teacher
Here's the good news: today's tools have completely leveled the playing field. You don't need a huge budget or a team of designers to produce professional-quality materials. Anyone with knowledge to share can now create compelling content that makes a real difference.
The most impactful training materials are born from a clear understanding of the learner's journey. They anticipate questions, simplify complexity, and provide a clear path from confusion to confidence.
Throughout this guide, we're going to get practical. I'll walk you through the steps to turn your expertise into an amazing resource for others. We'll focus on how to build content that respects your learners' time, grabs their attention, and truly sets them up for success.
Here's a high-level overview of the core steps. We'll break each of these down with practical examples throughout the guide.
Quick Guide to Creating Effective Training Materials
| Phase | Key Action | Why It Matters |
| 1. Planning | Define your audience, learning objectives, and content scope. | A clear plan prevents wasted effort and ensures your content hits the mark from the start. |
| 2. Creation | Draft content, design visuals, and choose the right format (video, document, etc.). | This is where you bring the plan to life, focusing on clarity, engagement, and accessibility. |
| 3. Distribution & Improvement | Share the materials, gather feedback, and use it to make iterative improvements. | Training is a living process; feedback is crucial for keeping it relevant and effective over time. |
Now that you have the big picture, let's dive into the details of how to make it all happen.
Laying the Groundwork for Your Training Content
I’ve seen it happen a thousand times: someone gets a great idea for a training module and dives straight into writing. It’s a classic mistake, and it almost always leads to wasted time and content that misses the mark. Before you write a single word, you need a blueprint. This initial groundwork is what makes the difference between training that sticks and a document that just gathers dust.
It all starts with a quick training needs assessment. This doesn't have to be some formal, corporate affair. It's really just about asking a few smart questions. What specific problem are you trying to solve? Are you seeing a gap in performance? Rolling out a new process?
Your first job is to nail down the core business objective. For example, if you run a small retail shop, your goal might be to "reduce customer complaints about returns by 15%." Right away, that tells you exactly what to focus on: the returns process. Everything else is noise.
Define Your Learning Objectives
Once you know why you're building the training, you can figure out what you want people to be able to do when they're done. Vague goals like "understand the new software" are useless in the real world. You need sharp, measurable learning objectives.
A fantastic tool for this is the SMART framework—Specific, Measurable, Achievable, Relevant, and Time-bound. It’s a simple way to force fuzzy ideas into concrete, actionable outcomes.
Consider the difference:
- Vague goal: "Learn about customer service."
- SMART objective: "After completing this 15-minute module, team members will be able to correctly process a standard product return without assistance, following all three steps outlined in the company policy."
That second one is powerful. It’s specific, you can measure it (did they do it right?), and it’s directly tied to the job. This kind of clarity will be your North Star as you start creating the actual materials.
Know Your Audience Inside and Out
Who are you actually training? The answer changes everything—the tone you use, how complex the material is, and even the format you choose. I always recommend creating a simple learner persona to keep your audience front and center.
This doesn't have to be a big project. Just jot down a few key details:
- Role and Experience: Is this a brand-new hire or a seasoned pro learning a new skill?
- Existing Knowledge: What do they already know about this? Don't bore them with the basics or confuse them with jargon.
- Learning Context: Where will they be doing this training? At a desk, on a sales floor with a tablet, or at home after hours? This helps decide between a video, a printable job aid, or an interactive quiz.
A training module for high school students cramming for an exam will look completely different from a guide for family members trying to figure out a new smart home device. The students might want gamified quizzes and quick video recaps, while the family would probably prefer a simple PDF with big, clear screenshots.
The most effective training materials are deeply empathetic. They anticipate the learner's questions, respect their time, and build a bridge from what they know now to what they need to know tomorrow.
Outline Your Core Content
With your objectives set and your audience in mind, you can finally sketch out the content. Don't write full paragraphs yet! Just map out the key topics in a logical sequence. Think of it as building the skeleton before you add the muscle.
For that retail returns training, a simple outline might look something like this:
- Welcome & Objective: Quickly state the goal—mastering the returns process.
- The Three Key Steps:
- Verifying the receipt and purchase date.
- Inspecting the item for damage.
- Processing the refund or exchange in the system.
- Handling Common Scenarios:
- What to do if there's no receipt.
- How to handle a customer complaint during a return.
- Quick Knowledge Check: A short, three-question quiz to reinforce the main points.
- Summary & Resources: A link to the full written policy for reference.
This structured approach is your best defense against creating materials that are unfocused or confusing. By taking the time to lay this groundwork, you’re setting yourself up to create training that doesn't just inform, but actually works.
Designing Materials That People Want to Use
Alright, you’ve got a solid plan in hand. Now comes the fun part: turning that blueprint into something real, engaging, and professional. The objective is to design materials that feel intuitive, look credible, and make the learning process as smooth as possible. Forget about those dense, intimidating walls of text we’ve all seen. We're going to focus on practical design principles that actually work.
Honestly, the way you present information is just as critical as the information itself. Good design builds trust and lowers the mental effort required from the learner—what experts call cognitive load. When you get it right, people can focus on absorbing the content instead of just trying to figure out where to look next. This is non-negotiable for creating training that truly gets results.
Structure Your Content for Clarity
The best training I've ever seen always guides the learner down a clear, logical path. So, before you even start thinking about fonts or colors, let's get the structure right. A messy, confusing flow is the fastest way to lose someone's attention.
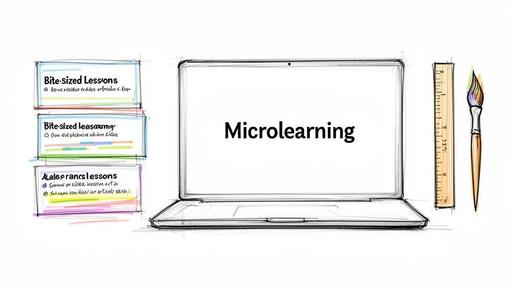
Start by breaking down your big, complex topics into smaller, bite-sized lessons. This is a concept called microlearning, and it's incredibly effective. Instead of creating one long, 45-minute video, try making a series of five-minute clips, with each one focused on a single skill or idea.
I’ve found this approach has some major advantages:
- Better Retention: People simply remember information better when it’s delivered in short, focused bursts.
- More Flexibility: Your team can actually fit the training into their day, squeezing in a quick module on a coffee break.
- Painless Updates: It’s so much easier to update one small video or a short PDF than it is to overhaul a massive, monolithic course.
Think of it like building with LEGOs. Each micro-lesson is a single brick. Your job is to stack them in an order that makes sense until you have a complete, sturdy structure.
Master the Visuals Without Being a Designer
You really don't need a degree in graphic design to create materials that look sharp and professional. A few simple rules can elevate your content from amateurish to polished, making it far more appealing and easier to digest. The secret is all about consistency and simplicity.
First, learn to love white space. Pages that are crammed with text and images are just overwhelming and hard to read. Leaving ample margins and plenty of space between paragraphs and images gives your content room to breathe. This simple trick helps guide the learner’s eye to what’s most important.
Next, be smart about your fonts. Stick to just one or two clean, readable fonts—one for your headings and another for the main body text. You can't go wrong with classics like Arial, Helvetica, or Open Sans because they were literally designed for screen readability. Your goal here is clarity, not winning an art award.
Good design is invisible. It doesn't draw attention to itself; it draws attention to the content. The best training materials use visual hierarchy to guide the eye naturally from one point to the next.
Finally, nail down a consistent look and feel. Use the same color palette and branding elements on every single page or slide. This consistency builds a sense of professionalism and makes the entire package feel like a cohesive, trustworthy resource.
Choose Your Delivery Method Wisely
How are people actually going to use this training? The format you choose—whether it’s a printable handout, an interactive e-learning module, or a slide deck—will heavily influence your design decisions.
The US training market is booming, and the cost-effectiveness of e-learning is a big reason why. To build top-tier materials, you need to think about your delivery method from the start. You might be creating purely virtual content, planning face-to-face sessions, or using a blended model that combines online flexibility with in-person depth. You can explore the corporate training market trends in the US to see how different formats are stacking up.
For example, a printable job aid for a cashier needs to be scannable and straight to the point, probably using bold headings and bullet points. On the other hand, a slide deck for a virtual team meeting can use more powerful visuals and fewer words per slide to keep everyone from zoning out. Tailoring your design to the delivery method is a simple but critical step for success. You can also check out our guide on active learning strategies for students for more ideas on keeping people engaged.
Let AI Do the Heavy Lifting in Your Workflow
Think of having a smart assistant who can instantly handle the most tedious parts of creating training materials. That’s what AI offers today. It’s not some far-off concept anymore; it's a practical tool that can seriously speed up your content creation, acting as a powerful partner to save you time and improve the quality of your work.
This isn't about replacing your expertise. It’s about offloading the grunt work so you can put your energy where it really counts—on strategy, engagement, and the unique needs of your learners. Let’s look at how this plays out in the real world.
From Raw Information to Polished Content
One of the biggest hurdles in building any training program is wrestling with dense source material. Imagine you have a complex 20-page company policy document. Turning that into a digestible training module could easily eat up hours of careful reading and summarizing.
With an AI tool like 1chat, you can just upload the document and ask it to do the heavy lifting for you. This approach is a total game-changer for anyone learning how to create training materials without a massive time investment.
For instance, you could prompt the AI: "Analyze this company policy on expense reporting. Pull out the five most important takeaways for new employees and create a three-question quiz to check their understanding." In seconds, you have a solid foundation to build from.
This same idea works for almost any source material. Got a long video recording of a product demo? Ask the AI to create a written summary and a step-by-step guide from the transcript.
Brainstorming and Drafting with an AI Partner
Sometimes, just getting started is the hardest part. Staring at a blank page is intimidating. AI can be an incredible brainstorming partner, helping you push past writer's block and get initial drafts down quickly. It's especially handy for creating scripts and role-playing scenarios.
Let’s say you need a short video to introduce a new software feature. Instead of trying to invent a script from scratch, you could ask your AI:
"Draft a friendly, 90-second video script for a tutorial on our new 'Project Tags' feature. The audience is existing users. Start with a hook that explains the problem this feature solves, then walk through the three simple steps to use it."
Just like that, you have a structured script ready for you to tweak with your own voice and specific details. The AI handles the basic framework, freeing you up to focus on the finer points.
This works just as well for soft skills training. You can generate realistic scenarios for practice:
- For Customer Service: "Create three role-playing scenarios for handling an upset customer whose shipment was delayed."
- For New Managers: "Brainstorm five discussion prompts for a leadership training session about giving constructive feedback."
- For Sales Training: "Generate a list of common objections a salesperson might hear about our product and suggest polite, effective responses for each."
The ability to generate varied content on demand is a huge advantage. If you want to explore this further, you can find a great breakdown of different AI tools for content creation in our detailed guide.
Using AI Prompts to Generate Training Content
The key to getting great results from an AI is knowing what to ask. By framing your requests clearly, you can generate a wide range of training assets. Here’s a look at how specific prompts can be used to create different types of content quickly.
Practical AI Prompts for Training Content Creation
| Training Asset | What to Ask the AI | Example Prompt |
| Quick Reference Guide | Ask for a summary of a long document, formatted as a scannable checklist or step-by-step guide. | "Create a one-page quick reference guide from the attached user manual for the X-200 model. Use bullet points and bold headers for key functions." |
| Video Script | Request a script with a specific tone, length, and structure. Include the target audience for better results. | "Write a 2-minute video script explaining our new remote work policy. The tone should be informative but friendly. Include a brief intro, 3 key policy points, and a concluding remark." |
| Quiz Questions | Provide text or a topic and ask the AI to generate assessment questions in a specific format. | "Based on the attached article about cybersecurity best practices, create five multiple-choice questions and two true/false questions to test comprehension." |
| Role-Play Scenarios | Describe a situation and the roles involved, then ask for a dialogue or scenario outline. | "Generate a role-play scenario for a manager and an employee discussing performance issues. The manager's goal is to be supportive but clear about expectations." |
| Illustrations | Describe the visual style and subject matter for a custom image to support your content. | "Create a simple, flat-style flowchart showing a three-step process: 'Submit Request,' 'Manager Approval,' and 'Ticket Closed.'" |
As you can see, a well-crafted prompt turns the AI into a specialized content creator, saving you hours of work on each asset.
Generating Visuals and Fine-Tuning Your Materials
Great training isn't just about the words; visuals are critical for keeping people engaged and helping them remember what they learned. Many AI tools can now create custom illustrations, diagrams, and other visual aids that make your content pop.
Instead of hunting for the right stock photo or struggling with design software, you can just ask. This saves an incredible amount of time.
Finally, AI is a fantastic proofreader. Before you send your materials out, run all the text through an AI to check for:
- Grammar and spelling mistakes
- Clarity and flow
- Consistent tone and terminology
This final polish helps ensure your materials look professional and are easy for everyone to understand. By weaving AI into these key stages—summarizing, drafting, visualizing, and polishing—you can produce better training materials in a fraction of the time.
Ensuring Your Training Is Accessible and Effective

It feels great to create a beautiful, well-structured training guide. But here's the reality: if your learners can't easily access the content or don't actually absorb it, all that hard work was for nothing.
This final stretch is all about making sure the training lands. We’ll focus on two things that can make or break your efforts: checking for understanding and guaranteeing universal access. This is how you turn a simple resource into a powerful tool for real learning.
How to Check for Understanding
The whole point of training is to build a new skill or change a behavior. But how can you be sure it actually worked? Forget about high-stakes, stressful exams. For most small teams, families, or students, simpler, low-pressure checks are way more effective.
The idea is to measure real comprehension and application, not just rote memorization. Here are a few straightforward methods I've seen work wonders.
- Self-Check Quizzes: Pop a few informal questions (3-5 is perfect) at the end of a section. The goal isn't to get a grade, but to give learners a quick way to see if they're solid on the material or need to review something.
- Practical Application Tasks: This is where the rubber meets the road. Ask learners to do something with what they just learned. For a small team, maybe they process a mock customer return. If you’re teaching a family a new budgeting app, have them categorize five sample expenses.
- Teach-Back Sessions: This is one of my favorite methods, especially for teams. Just ask someone to explain the key process back to you or a colleague in their own words. You'll spot any gaps in understanding immediately in a way that feels collaborative, not confrontational.
Effective assessment isn't about proving what someone doesn't know. It's about building confidence and confirming that the core message has been successfully transferred from your materials to their workflow.
Making Your Materials Accessible to Everyone
Accessibility isn’t a box to check at the end—it's a fundamental part of good design. When you design for accessibility, you're making deliberate choices so that people with different abilities can see, understand, and interact with your training.
And honestly, these choices benefit everyone. Captions on a video are essential for someone with a hearing impairment, but they’re also a lifesaver for the person watching in a noisy office or for a non-native speaker. An accessible approach is just smart design.
Keep this simple checklist handy to make sure your training is inclusive:
- Use Clear and Readable Fonts: Stick to clean, sans-serif fonts like Arial or Verdana. A 12-point font size is a good minimum for body text. Ditch the fancy script fonts; they’re a nightmare to read.
- Ensure High Contrast: Text needs to pop against its background. You can't beat classic black text on a white background. If you're using color, a free online contrast checker can tell you if your choices pass the test.
- Add Alt Text to All Images: Alternative text (alt text) is a short, descriptive sentence that screen readers use to describe an image. It should convey the same meaning as the visual itself.
- Provide Transcripts and Captions: For any video or audio, closed captions and a full written transcript are non-negotiable. This is one of the most important accessibility features you can include.
- Use Descriptive Link Text: Instead of vague phrases like "click here," write link text that tells people exactly where they’re going. Think "Download the full safety policy" instead.
Making these practices a habit ensures your training can have the biggest impact on the widest possible audience. To dig even deeper into this, you can learn more about knowledge management best practices in our comprehensive guide.
Getting Your Materials Out There (And Making Them Better)
You've done the hard work. The content is polished, proofed, and ready to go. But creating great training material is only half the battle; now you need to get it into people's hands and, just as importantly, figure out what's working and what isn't.
Think of this not as a final step, but as the beginning of a conversation with your learners.
Smart and Simple Distribution
For small teams, families, or student groups, you don't need a massive, expensive Learning Management System (LMS). Honestly, the simpler you keep it, the more likely people are to use it.
A shared cloud folder on a platform like Google Drive or Dropbox is often the perfect solution. Just create a logical folder structure, pop everything in, and share one single, clear link. This prevents the classic "I can't find that email you sent last month" problem and gives everyone a central place to go for information.
Creating a Feedback Loop That Actually Works
Once your materials are in the wild, it's time to listen. Without a system for feedback, your content is static. It can't grow or adapt to what your audience truly needs. You need to know what clicked, what was confusing, and what was completely missed.
The best way to do this is with a short, simple feedback survey.
Feedback isn't about hunting for mistakes. It's about seeing the material through your learner's eyes. That perspective is what turns a good resource into a great one that keeps getting better.
The key is to ask questions that give you actionable answers. Keep the survey brief—nobody wants to spend more than a couple of minutes on it.
Here’s a simple set of questions I’ve found to be incredibly effective. Feel free to adapt them:
- Clarity: On a scale of 1-5, how clear and easy to understand was the information?
- Relevance: How useful was this training for what you actually do day-to-day?
- The Best Part: What was the single most helpful thing you learned?
- The Muddiest Point: Was there anything that left you feeling confused or with unanswered questions?
- One Small Change: If you could suggest one thing to improve this training, what would it be?
This kind of structured feedback gives you real data, not just vague feelings. As the responses come in, you'll start to see patterns. Maybe everyone loves a particular example, or perhaps a specific section is consistently flagged as confusing. Those patterns are your roadmap for future improvements, ensuring your guide on how to create training materials results in content that genuinely helps people learn.
Got Questions? Let's Get Them Answered
Even with the best plan in hand, you're bound to run into questions, especially when you're just starting out. Here are a few common ones I get asked all the time, along with some straightforward answers.
What's the Ideal Length for a Training Module?
There’s no hard and fast rule, but the industry has overwhelmingly shifted toward microlearning. The idea is to create bite-sized, focused lessons that someone can complete in a single, short session.
My personal sweet spot is somewhere between 5 and 15 minutes.
If you're tackling a big, complex subject, don't try to cram it all into a single hour-long behemoth. Your best bet is to break that monster topic down into a series of shorter, more manageable lessons. This approach does wonders for retention and makes it way easier for people to fit training into their busy schedules.
What Are the Best Free Tools for Building Materials?
You can create some seriously professional-looking training content without spending a dime. A few powerful, free tools can cover pretty much all of your bases.
- For the Basics: You can't go wrong with Google Docs and Slides. They're perfect for drafting scripts, building presentations, and working with others.
- For Visuals: Canva is a lifesaver, especially if you're not a designer. Use it to create polished graphics, one-page guides, and checklists.
- For Ideas and Drafts: An AI assistant like 1chat is amazing for brainstorming, whipping up a first draft, summarizing source documents, or even generating a quick quiz.
- For Simple Video: If you need to record your screen for a tutorial, Loom has a great free version that's incredibly easy to use.
Don't get lost in the weeds trying to find the "perfect" software. The best tool is the one that lets you create clear, helpful content without a steep learning curve. Focus on the message first.
How Do I Know If My Training Is Actually Making a Difference?
This is the most important question of all. Good training always results in a measurable change, whether it's in what people know or what they can do. You don't need formal exams; a mix of simple checks and real-world observation works best.
Start with quick quizzes or simple hands-on activities right after the lesson to check for immediate understanding.
But the real test happens later. Are people actually applying what they learned on the job? Are they doing the task correctly and more efficiently? That's your true measure of success.
And finally, just ask! A simple feedback survey can give you priceless insights. Find out what worked, what didn't, and what you can do to make the next training session even better.