At its core, creating a watermark is about making a semi-transparent version of your logo or text and saving it as a file you can use over and over—usually a transparent PNG. You can get this done with powerful tools like Adobe Photoshop, free software like GIMP, or even a user-friendly online option like Canva. Getting your watermark file ready is the first real step toward protecting your work and building your brand online.
Why Watermarking Is Your First Line of Defense
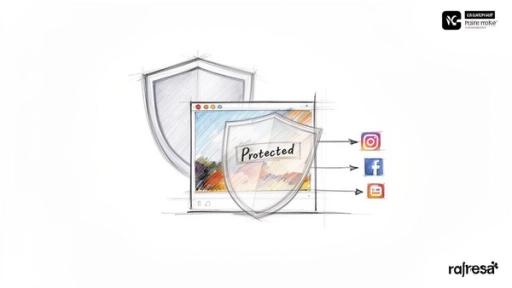
Let's be honest—the moment you post something online, it can be shared, screenshotted, and reposted in a flash. That’s why knowing how to create a watermark isn't just for professional photographers anymore. It’s a fundamental skill for anyone putting original work out there, whether you run an e-commerce shop, create digital art, or manage a small business's social media.
I always think of a watermark as a digital signature. A good one pulls double duty, offering both protection and promotion. First, it’s a clear deterrent. It makes it just a little bit harder for someone to pass your work off as their own. Sure, a determined thief might try to edit it out, but for casual content "borrowing," it's often enough to make them move on.
The Dual Role of Protection and Branding
Beyond just being a barrier, a watermark is one of the most effective, low-cost branding tools you can have. Every time your watermarked image gets shared, your name or logo goes right along with it. This builds brand recognition across platforms without you having to lift a finger.
Imagine a small clothing boutique posting product photos on Pinterest. A consistent, tasteful watermark makes their images instantly recognizable. Or think of a digital artist on Instagram; a subtle signature in the corner ensures every share can be traced back to their profile, driving new followers and potential commissions.
A watermark doesn't just say, "This is mine." It also says, "This is who made it." It transforms a simple defensive measure into a proactive branding asset that builds equity with every share.
This isn't just a niche concern, either. The demand for content protection is skyrocketing as more people become aware of copyright. The global digital watermarking market was valued at USD 1.45 billion in 2024 and is expected to climb to USD 3.80 billion by 2033. That growth, tracked in reports from firms like Grand View Research, shows just how crucial this has become.
Building Trust in an AI-Driven World
The recent explosion of AI-generated content adds a whole new reason to watermark your work. With tools that can spit out incredibly realistic (but completely fake) images, proving authenticity is more important than ever.
A consistent watermark acts as a stamp of authenticity. It tells your audience that a real person or a legitimate brand is behind the image, helping your work stand out in a sea of synthetic visuals. It's a small signal of trust that helps you build a loyal following who associates your mark with quality and genuine creativity. This guide will walk you through exactly how to create a watermark that does all of this for you.
Designing a Watermark That Works
Before you even open a program like Photoshop or Canva, we need to talk design. Knowing how to create a watermark is less about the tool and more about the strategy. A great watermark protects your work and reinforces your brand, all without distracting from the image itself. A bad one just looks amateurish and can completely tank an otherwise beautiful shot.
The real goal isn't to just slap your name across your photo. It’s to create a subtle, professional signature that does its job without screaming for attention.
Logo vs. Text: Which Is Right for You?
Your first big decision is whether to use a logo or simple text. There’s no right or wrong answer here; it all comes down to your brand and the kinds of images you’re trying to protect.
- Text-Based Watermarks: These are clean, simple, and my go-to recommendation for individual creators. If you're a photographer, writer, or artist, a straightforward "© Your Name" or "yourwebsite.com" is incredibly effective. It directly attributes the work, which is exactly what you want when your personal name is your brand.
- Logo-Based Watermarks: If you’re running a business with an established logo, using it as your watermark is a no-brainer for brand consistency. This is perfect for e-commerce shops, creative agencies, or any company with a recognizable brand mark. My advice? Use a simplified, single-color version of your logo for the cleanest look.
Think of it this way: a wedding photographer might use their elegant, scripted signature. But a brand that sells hiking gear would get more mileage out of placing its rugged mountain logo on its product photos.
Finding the Sweet Spot with Opacity
Opacity is the secret ingredient to a professional watermark. If you make it too bold, it becomes an obnoxious eyesore. But if it’s too faint, it offers zero protection. From my experience, the magic number is usually somewhere between 15% and 40% opacity.
Your watermark should be visible enough to be legible on close inspection but subtle enough that it doesn’t pull the viewer’s eye away from the image’s subject. It should feel like a part of the image, not something stuck on top of it.
I always tell people to start at around 30% opacity and then tweak it. The perfect level really depends on the photo. A watermark placed over a dark, busy background might need a little more opacity to be seen, while one floating in a clear blue sky can be much fainter. Test it on a few different images to get a feel for what works.
Strategic Placement to Deter Theft
Where you put your watermark is just as crucial as what it looks like. The single biggest mistake I see is people sticking their watermark in an empty corner against a plain background. That’s an open invitation for anyone to crop it out or remove it in seconds with a content-aware fill tool.
You have to think defensively. The key is to place your watermark over a part of the image that has some detail or texture. You don't want to obscure your subject, of course, but you do want it to overlap with elements that would be a nightmare to clone or rebuild if the watermark were removed.
Try thinking about these placements:
- The "Rule of Thirds" Intersections: Placing a small watermark near one of the four intersection points of a rule of thirds grid almost always looks natural and is much harder to just crop away.
- Along an Edge with Texture: Position it near the edge of the frame but make sure it overlaps a textured element—think the pattern on a piece of clothing, the leaves on a tree, or the bricks on a building.
- Tiled Pattern (For Proofs): This is a powerful technique for client previews. A repeating, tiled pattern of your logo or text at a very low opacity (5-10%) offers maximum protection, making it virtually impossible for someone to use the image without your permission.
Before we move on to creating the files, here's a quick cheat sheet to help you lock in your design choices.
Watermark Design Quick Reference
This table summarizes the key decisions we've just covered, offering a quick look at the best approach for either a logo or text-based design.
| Element | Logo Watermark Recommendation | Text Watermark Recommendation | Best Practice Tip |
| Design | Use a simplified, monochrome version of your official logo. | Choose a clean, legible font. A simple "© Name" or website URL works best. | Avoid complex graphics or multiple colors that will distract from the photo. |
| Opacity | Start at 20-30% and adjust based on the image's colors. | Start at 30-40%, as text often needs a bit more opacity to remain legible. | The goal is subtlety. It should be visible but not the first thing people see. |
| Placement | Over a textured area, near a rule of thirds intersection. | Along an edge, but overlapping a detailed part of the image. | Never place it in an empty corner. This makes it too easy to crop or remove. |
| Color | White or a light gray is most versatile. Black for very light images. | White or a 50% gray. It provides good contrast on most backgrounds. | Stick to one color. Your watermark should be neutral, not a design statement. |
By combining a clean design, balanced opacity, and smart placement, you’ll have a watermark that protects your work while looking like a seamless part of your brand.
How to Create Your Watermark in Popular Design Tools
Alright, you've got your watermark strategy down. Now it's time to roll up our sleeves and actually create the file you'll use over and over again. The good news? You don't need a fancy, expensive program. We’ll walk through options for every budget and skill level.
The end goal is a single, high-quality image file with a transparent background. A photographer I work with saves hours every month simply because she has this one file ready to go. She just drags it onto her edited photos, tweaks the size, and exports. That’s the kind of time-saving asset we’re going to build.
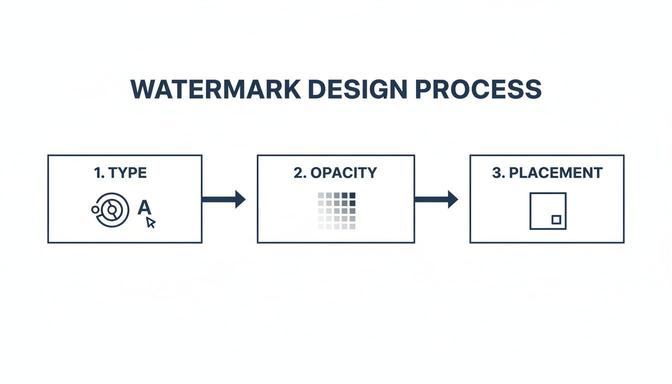
This simple workflow really boils down to three key decisions: what your watermark says, how visible it is, and where you place it.
Let's put these principles into action using some of the most common design tools out there.
Creating a Watermark with Adobe Photoshop
For professionals or anyone already in the Adobe ecosystem, Photoshop is the industry standard for a reason. It offers total control, which is exactly what you want for a critical asset like a watermark.
First, make a new document. I usually start with a 2000 x 2000 pixel canvas at 300 DPI, which gives you plenty of resolution. The most critical setting here is under "Background Contents"—make sure you select Transparent. This single step prevents the dreaded white box from appearing around your watermark later on.
Now you can add your content:
- For text: Grab the Type Tool (T) and write out your name or website. Stick with a clean, readable font and set the color to black or a neutral 50% gray for now.
- For a logo: Go to
File > Place Embeddedand choose your logo file. If your logo has a lot of detail, I’d suggest using a simplified, one-color version to ensure it looks good at small sizes.
Once your text or logo is on the canvas, find the Opacity slider in the Layers panel. Drop it to somewhere between 20-40%. This is just a starting point; you can always adjust it on a per-photo basis, but this range is a great default.
To finish, head to File > Export > Quick Export as PNG. Photoshop’s default for this command is a PNG with transparency, which is exactly what we need. That's it—your reusable watermark file is ready.
A Powerful Free Alternative GIMP
Don't have a Photoshop subscription? No problem. GIMP (GNU Image Manipulation Program) is a fantastic, free, and open-source tool that is more than capable of creating a professional-grade watermark. The steps will feel very familiar.
Start a new project by going to File > New. Set your dimensions (again, 2000x2000 pixels is a solid choice). You'll need to click on "Advanced Options" and find the "Fill with" dropdown. Change it to Transparency. This is GIMP’s way of giving you a blank, transparent canvas.
From there, use the Text Tool to add your text or bring in your logo using File > Open as Layers. You'll find the Opacity slider right at the top of the Layers dialog. A starting value of around 30% usually works well.
Pro Tip: In both Photoshop and GIMP, a great final touch is to trim the extra transparent space around your watermark. In GIMP, the command is Image > Crop to Content. This makes the final PNG file smaller and much easier to position later.When you're ready to save, go to File > Export As. Name your file with a .png extension (like "my-watermark.png") and click "Export." GIMP will save a clean, transparent PNG that you can start using immediately.
Quick and Easy Watermarks with Canva
For many creators, speed and simplicity are the top priorities. This is where a tool like Canva truly excels. I often recommend it to small business owners who tell me they "hate making graphics," because Canva makes it feel less like work.
Start by creating a new custom-sized design. A square canvas like 2000x2000 pixels works perfectly. If you have Canva Pro, you can select the "Transparent Background" option when you download. If you're using the free version, you'll start with a white background, but there's an easy workaround.
Use the "Text" tool to add your business name or pull from your Brand Kit. You can also upload your logo directly. After placing it, look for the transparency icon (it looks like a checkerboard) in the top-right menu and lower the opacity.
Here’s the process for saving it:
- Click the Share button.
- Choose Download.
- Set the file type to PNG.
- If you have Canva Pro, just check the box for "Transparent background."
If you're on the free plan, you have one extra step. Download the PNG with the white background, then use a free online background remover tool to strip out the white before saving your final transparent file.
The demand for these skills is growing. The digital watermarking market is projected to skyrocket to USD 4.03 billion by 2035, up from USD 1.54 billion in 2025. This growth is heavily driven by media and entertainment companies fighting to protect their content, especially with the explosion of AI-generated media.
As you create your own visual assets, you might also be curious about how AI is changing the game. If you want to dive deeper into that world, you can explore our guide on how to generate images with AI.
Automating Your Watermarking Workflow
Once you’ve nailed down how to create a watermark, applying it to a few photos is no big deal. But what about when you’re staring down a folder with a hundred product shots or an entire wedding gallery? Manually placing, resizing, and saving each image quickly turns into a mind-numbing, time-consuming chore.
That’s where a little automation can be a total game-changer. Setting up a batch processing workflow is the secret to getting hours of your time back. It turns a tedious task into something you can run with a single click, ensuring every image is perfectly consistent and freeing you up to do more creative work.
Using Actions in Adobe Photoshop
If you’re a Photoshop user, the "Actions" panel is your new best friend. Think of an Action as a personal macro; you record a series of steps one time, and then you can "play" that recording back on any image or even an entire folder of them. It's like building your own little watermarking robot.
To get started, you just need a single image open so you can show Photoshop what you want it to do.
- First, open your Actions panel (you can find it under
Window > Actions). - Create a new "Action Set" by clicking the folder icon and give it a name you’ll remember, like "My Watermarks."
- Then, click the square "Create new action" icon, name this one something specific like "Add Logo Watermark," and hit "Record."
Now, Photoshop is watching everything you do. Go to File > Place Embedded and choose your transparent PNG watermark file. Move it and resize it to the exact spot you want it to appear on all your photos. Once it’s perfectly placed, just click the square "Stop" button in the Actions panel. You’ve just built your first automated workflow.
To put it to work on a whole batch of photos, head over to File > Automate > Batch. In the pop-up window, choose your "My Watermarks" set and the "Add Logo Watermark" action you just made. Select the folder of images you need to process, pick a destination for the finished files, and click "OK." Go grab a coffee—Photoshop will handle the rest.
Command-Line Automation with ImageMagick
For those who are comfortable working in a terminal or want to build watermarking into a larger script, a tool like ImageMagick is incredibly powerful. It’s a free, open-source software suite that lets you create, edit, and manipulate images right from the command line.
This approach is perfect for developers or anyone managing a server who needs to process images without a graphical interface. You could, for instance, set up a script that automatically watermarks any new image uploaded to a specific folder on your server.
A basic command to overlay your watermark might look something like this:
magick composite -gravity southeast -geometry +20+20 watermark.png input-image.jpg output-image.jpg
Let's break that down. This command tells ImageMagick to:
- Use the
compositetool to layer one image over another. - Place the watermark in the
southeastcorner (that's the bottom-right). - Add a
+20+20pixel margin from the corner. - Use
watermark.pngas the overlay oninput-image.jpg. - Save the final image as
output-image.jpg.
It definitely has a steeper learning curve, but ImageMagick offers fantastic flexibility for complex, automated image workflows. It’s a great example of how a little bit of code can help you learn how to automate repetitive tasks and save a ton of time.
Automated Plugins for WordPress and E-commerce
If you run your website on a platform like WordPress or Shopify, you can often automate watermarking without ever leaving your dashboard. Countless plugins and apps are designed to automatically add your watermark to any image you upload.
This is a lifesaver for e-commerce stores. You set it up once, and every single new product photo gets your brand's watermark, ensuring consistency across your entire site. It completely removes the step of having to prep your images before uploading them.
These plugins typically give you some great options:
- Use either text or your logo image as the watermark.
- Control the watermark's position and opacity.
- Apply watermarks only to certain image sizes (like the full-size version, but not the small thumbnails).
- Go back and apply watermarks to your entire existing media library in one go.
The move toward automation isn't just about convenience—it's a direct response to the massive volume of digital content we create and the pressure to work more efficiently. At a certain scale, automation becomes a necessity.
The AI boom has only cranked up this demand. The AI watermarking market was valued at USD 769.7 million in 2026 and is expected to explode to USD 3,753.3 million by 2033, a staggering 25.4% compound annual growth rate. This incredible growth is fueled by the need for high-speed, low-cost systems that can process the billions of daily uploads on major platforms. By automating your own workflow, you’re simply adopting the same efficiency principles that power the biggest content sites in the world.
The Future of Image Protection: Invisible Watermarks and AI
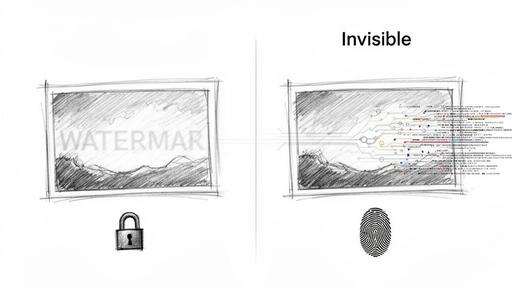
Once you've mastered adding a visible logo to your work, you've taken a great first step. But the real cutting edge of image protection is something you can't see at all. We're talking about invisible watermarks, a technology that embeds information directly into the very pixels of an image.
This technique is a type of steganography, where data is hidden in plain sight. It doesn’t just slap a transparent logo on top; it subtly changes the image’s data in a way that's undetectable to the human eye but readable by specific software. It’s less like a signature on a painting and more like a strand of DNA woven into the canvas itself.
This completely changes the security equation. A visible watermark can be cropped out, blurred, or painstakingly removed by a determined thief. An invisible watermark, on the other hand, is designed to stick around.
The Power of Forensic Watermarking
This is where the technology truly shines. Forensic watermarks are a sophisticated type of invisible mark engineered to be exceptionally resilient. They can embed crucial data—like a creator ID, a timestamp, or a unique transaction number—right into the image file.
Because this data is spread across the entire image, the watermark can often be recovered even if the file is tampered with. It's designed to survive being:
- Cropped: Removing a corner of the photo doesn't erase the watermark.
- Compressed: The data is robust enough to withstand being saved as a lower-quality JPEG.
- Edited: Basic changes to color or brightness usually won't destroy the embedded information.
This makes it an invaluable tool for proving ownership or tracing the source of a leak. If a private photo you shared under an NDA appears online, a forensic watermark could identify exactly which recipient was responsible. For high-value digital assets, this provides a level of security that visible marks just can't offer. Of course, this should be part of a broader strategy of securely sharing your digital files to add multiple layers of protection.
Combating the Rise of AI-Generated Content
With the explosion of AI image generators and deepfakes, how can we trust that what we're seeing is real? Invisible watermarks offer a powerful solution to this growing problem.
Major tech companies are already tackling this head-on. Google, for example, has developed a tool called SynthID, which adds an imperceptible digital watermark directly to images created by its AI models. This mark acts as a hidden label, signaling that the image is synthetic, and it’s designed to be extremely difficult to remove.
As AI-generated content becomes indistinguishable from reality, invisible watermarks will become a crucial tool for authentication. They won't just protect copyright; they will help us verify the origin of an image and build a foundation of digital trust.
This isn't some distant future; it's happening right now. The goal is to establish a reliable method for telling authentic photography apart from synthetic media. For creators, this means your genuine work can be verified. For the public, it provides a necessary tool to spot potential misinformation. Understanding how to create both visible and invisible watermarks is quickly becoming an essential skill for any modern creative.
Frequently Asked Questions About Watermarking
Alright, you've gone through the steps and created your watermark file. But actually putting it to use day in and day out is where the real questions pop up. Let's tackle some of the most common things people ask once they have that shiny new watermark file in hand.
How Easily Can a Watermark Be Removed?
I get this question all the time, and the honest answer is: it depends entirely on how you apply it.
If you just slap a semi-transparent logo in a blank corner of the sky, anyone with basic photo editing skills can remove it in about ten seconds. They’ll just crop it out or use a content-aware tool to paint right over it. It’s a pretty weak deterrent.
But, if you place that same watermark over a detailed part of your image—like a person's hair, a textured fabric, or a busy cityscape—it suddenly becomes a massive headache to remove cleanly. Removing it without leaving obvious smudges or artifacts takes real skill and time. That's what makes it a good deterrent. For ultimate protection, a repeating, tiled watermark across the entire image is nearly impossible to remove without completely ruining the photo.
What Is the Best File Format for a Watermark?
Let me save you some time: the answer is PNG (Portable Network Graphics).
This format is the undisputed champion for one simple reason: transparency. A PNG file allows you to have a transparent background, meaning only your logo or text appears. You won't get that ugly, unprofessional white box around your watermark when you place it over an image.
As a pro-tip, always create your watermark file at a high resolution. Think about working on a canvas that’s at least 2000x2000 pixels at 300 DPI. This ensures your watermark looks sharp and crisp, even when you scale it down.
Key Takeaway: Always use a high-resolution PNG file with a transparent background for your watermark. It's the industry standard for a reason—it gives you the quality and flexibility you need.
Should My Watermark Be Different for Social Media?
Absolutely. You should think of your watermark like an outfit—it needs to be appropriate for the occasion (or, in this case, the platform).
On a highly visual platform like Instagram, your primary goal is to let the photo shine. A big, obnoxious watermark will just distract viewers. Here, a smaller, more subtle mark—like a signature or a small icon tucked into a detailed corner—is usually the best approach.
But for a platform like Pinterest, where images get saved and shared constantly (often losing their original source), a more prominent watermark can be a smart business move. Including your name or website URL can actually help drive people back to your work. Don't be afraid to experiment to find the right balance for your brand.
How Do I Add a Watermark Without Photoshop?
No Photoshop? No problem. The days of needing expensive, complex software for this are long gone. You have some fantastic and often free options available.
User-friendly tools like Canva (online) and the incredibly powerful GIMP (a free downloadable program) are both excellent alternatives to Photoshop.
Here are a few common workflows that don't involve Adobe:
- Online Editors: Most web-based photo editors let you upload your photo as a base layer and then add your watermark PNG file as a second layer on top.
- Mobile Apps: Many video and photo editing apps, like CapCut, have features for overlaying images or adding text directly on your phone.
- Batch Processing Tools: If you have to watermark hundreds of photos, look into a dedicated batch watermarking tool. These programs can apply your watermark to entire folders of images at once, saving you a massive amount of time.